About Me

My photo
Columbus, Ohio, United States
I'm a stay at home mom and wife with a passion for family, creating and photography. I'm a little bit quirky and a little bit odd, but that's what makes me...well me. I'm a jack of all trades. So check back often because, to paraphrase Forest Gump's mom "I'm like a box of chocolates, you never know what your going to get.

Wednesday, August 15, 2012

Pickling Perfection


I remember growing up every year my grandmother would make several batches of Bread and Butter pickles and dill pickles from cucumbers she had grown in her garden. So feeing a bit nostalgic, I decided this year I would tried my hand at growing pickling cucumbers.   We're not big fans of cucumbers, but pickles are a different thing. We love them on burgers and in salads.  I'm glad I did, these little gems so far are amazing. I say so far, because I've only tried them pre-canning, but my husband loved them also, and he's a bit picky about his pickles. So I'm excited to open and use them in a few weeks. If you know the basics of canning, these are simple to make and definately worth taking the time to make. So much so these little pickling cucumbers have definately earned their place in my garden from here on out.


Hamburger dill pickles

Ingredients:

4 pounds pickling cucumbers
2 tablespoons canning salt or kosher salt
2 1/2 quarts water
3 cups distilled white vinegar
3 cups water
2 tablespoons sugar
2 tablespoons kosher salt
fresh pickling dill
3 teaspoons mustard seeds
6 bay leaves
18 to 24 black peppercorns
Preparation:

Slice ends off cucumbers then slice in 1/4-inch rounds. Put the cucumber slices in a large nonreactive bowl or pot and cover with the 2 1/2 quarts of water. Add 3 tablespoons salt, and a few pieces of fresh dill and stir until salt is dissolved. Cover and let stand for at least 12 hours.
Drain cucumber slices.

Prepare jars. Fill a boiling water canner half-full with water; add jars and bring to a boil. Cover and reduce heat to low to keep jars hot.

In a nonreactive pot, combine the 3 cups vinegar and 3 cups water. Stir in 2 tablespoons sugar and 2 tablespoons of salt until dissolved. Bring to a boil. Into each of 6 pint jars, 1 or 2 fresh dill flower heads, 1/2 teaspoon mustard seeds, 1 bay leaf, 3 or 4 peppercorns, and about 1 teaspoon of chopped garlic. Pack with cucumbers.

Add hot vinegar mixture to each jar, leaving 1/2-inch of headspace.

Wipe rims and threads of jars with a damp paper towel. Fit with lids and screw on jar rings tightly. Put the jars in a rack and lower into the hot water. If necessary, add more boiling of near-boiling water so the water level is 1 to 2 inches above the jars. Bring to a boil. Cover and boil gently for 10 minutes. Remove to a rack to cool completely. Check for seals about 24 hours later. Store in a cool dark place for a few weeks before using.
Makes 6 pints.

Friday, April 13, 2012

Instagram


OMG!!!! The day has finally arrived! I now have Instagram for my Droid phone. I've been doing a happy dance all week. Beside client work, I haven't even picked up my DSLR this week. I have a shiny new toy.  I love the emotion Instagram effects give to the image. It's effects that I would spend hours otherwise trying to figure out. Perfect for just wanting to freeze random moments in time. You can freeze it, record it's significance and store it for later. I know they are only cellphone photos, but the moment was important enough to pull out your camera, why not record it in the best possible light. Instagram allows you to do this quick and easy.

Case in point......

This is a quick snapshot of some flowers I bought for the neighborhood entrance flower bed. For once it actually took more time to shoot the photo than to edit it. Yippee!!!! 


I am a photographer, and my DSLR camera is my life and wouldn't trade it for the world.  I am by no means a camera snob though. I believe that the best camera is always the one you have with you. Make the most with you have. More times than not that is my cellphone. I've had times in my live that the only camera I had was my cellphone, so I just learned how to use it to the best of it's ability. I think that has made a huge difference on my work professionally.  

Thursday, April 12, 2012

Developing a Creative space

I've been doing a lot of juggling these days. Especially since I'm transitioning from a stay at home mom to a work at home mom. Being a photographer, artist, blogger, karaoke diva, domestic goddess, budding master chef/baker, super mom and wonder wife is a little difficult to balance. Lately I've been working on my office/creative space. I always have something going on and can never find what I need to complete it. I know I have it, I just don't know where it's at. My current use of space just isn't working. Since this is going to be my command central for pretty much everything involving the family, business and my passion for art, this space is going to be key to keep everything together.


The previous space I was using was a crawl space in the playroom. This photo was before I moved  my stuff in. Trust it was full in no time. It has plenty of shelves and storage, but not head room. You always had to move the couch and furniture to get in to it, so I simply would put things off. Another pitfall was it's lack of lighting and electrical outlets. Don't get me wrong. It's a great space, it's just not convenient or inspiring. I want something I can easily go into everyday and be inspired. This will remain storage, but most of my supplies are going to be moved into my Shangri La aka the laundry/dressing area.

It's not a huge space, but the actually laundry is in a small room off the side and two of the walls are wall to wall closets. I was going to use both for closet space, but I don't need that much space for clothes. I do need a great work and artist space that I walk through everyday and get inspired.

I'm still in the planning stages. I can't afford to buy a bunch of stuff so I'm using what I have. Today I took stock.  I have say I have accumulated a great collection of cool containers, but I never seem to use the constructively. I'm hoping with the help of pintrest I can organize my thoughts into a complete design finally. I'm thinking rustic, shabby chic, fantastical, steampunk, antique, distressed......you get the idea. And chalk paint, basic black chalk paint. Everywhere!!!! This is a taste of cool storage items I already have. I think I've got a good plan to start with. Now I guess I need to explore pintrest to figure out how to pull it together.


There's wooden wine creates, galvanized metal buckets, and baskets


Vintage and dying to look vintage photo boxes


Antique Mason & Bell Jars

...and plenty of other containers just waiting to be altered. Well an idea is planted, and now I need to let it sprout into a plan. Until then I best get back to work.


Tuesday, April 10, 2012

Vintage Type

Monday's are always blah days. The Sunday evening release of the past week's frustration behind the karaoke mic always leaves the soul cleansed, but the body drained. There has been a lot of frustration to banish the past few months. Finances have been tight and emotions have been high. So thrifting hasn't been a luxury as of late. April is the first month since before Thanksgiving that the purse strings have really been loosened.  This weekend the hubs was complaining about the lack of dishes (Most didn't survive the last move). So today in my haze I decided to stop at the Goodwill I pass everyday on the way to take little man to preschool. I shop there periodically. It has set prices and doesn't run many sales, so I don't  shop there as often as other stores. I do call it my boutique store because they carry higher end items. As usual I found some great designer clothes and purses, but my find of the day was an antique typewriter.


It is an Underwood standard No. 5. Put out between 1900 -1920 (I think). Steam-punk at it's very core. Inspiration struck, and for $15 it couldn't be left behind. This is just a quick cellphone shot. An idea has been germinating for awhile and this prop will be an ideal center for a character to develop. 

But for now the energy is drained, and must be recharged. This story will be continued on a later day.

BTW I did pick up a few stoneware dishes so I still did what I set out to do......


Sunday, April 8, 2012

Hoppy Easter

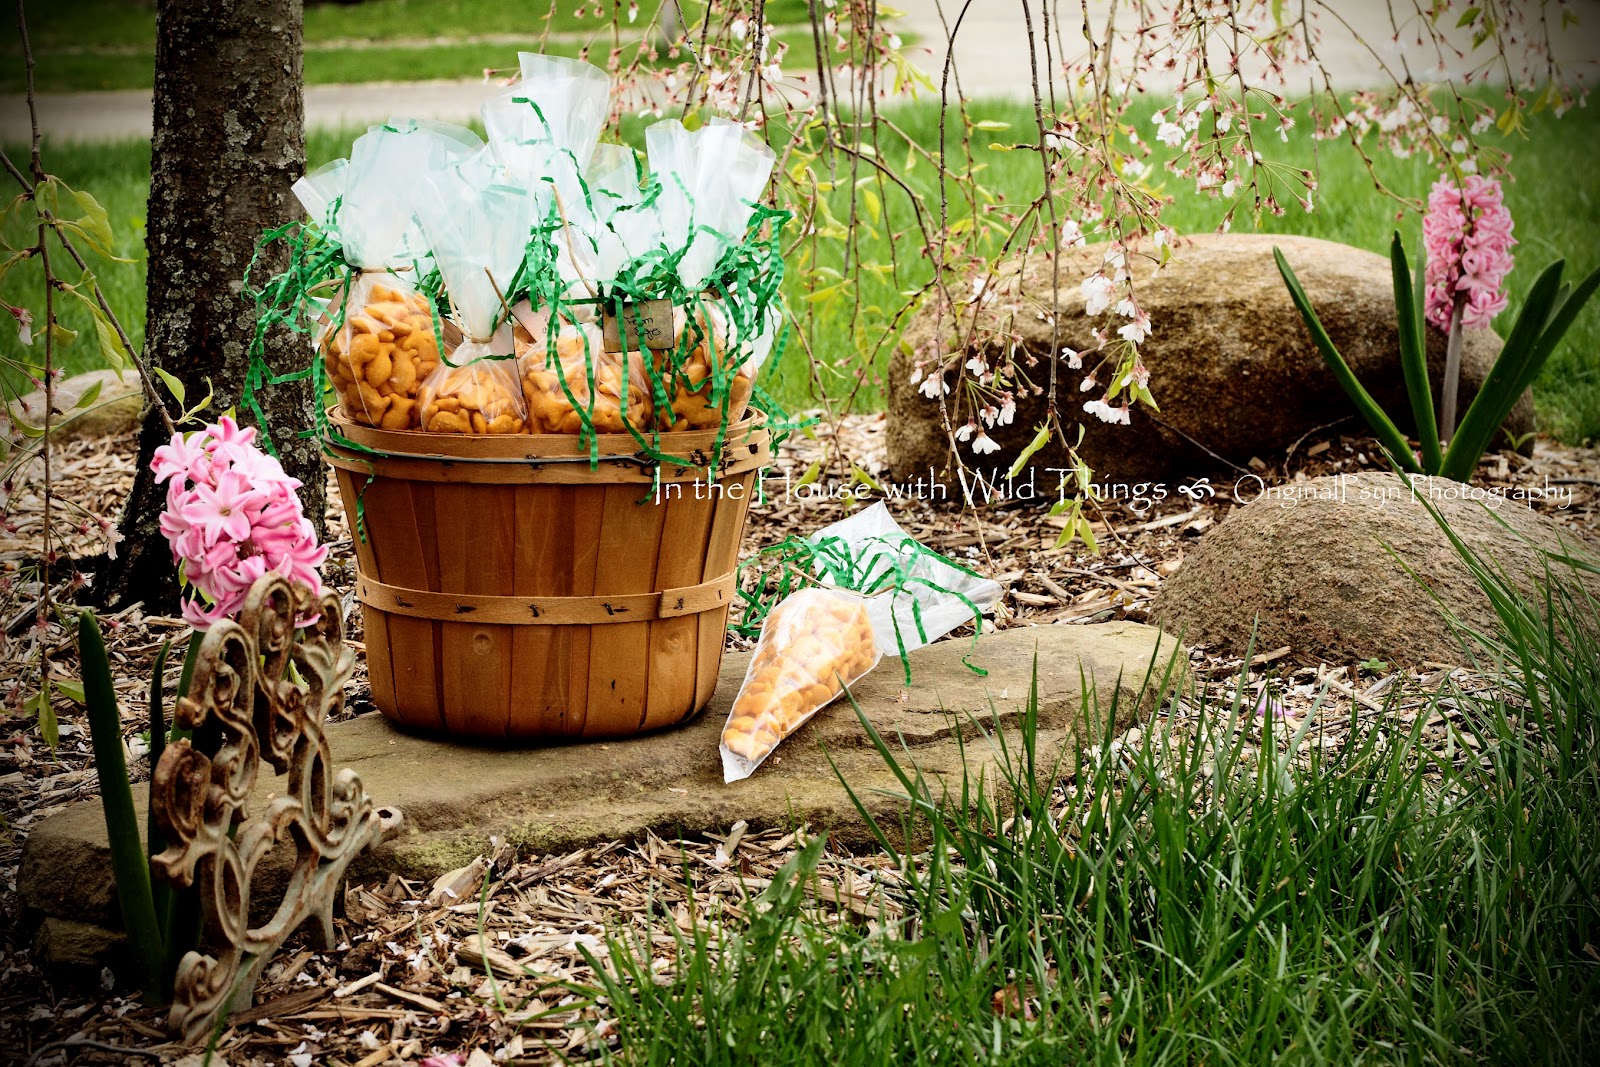
Happy Easter everyone. March was a busy month for OriginalPsyn Photography and April even more so. That is a great thing, but I got so wrapped up in business that I almost forgot to plan out something special for my son to take to preschool for Easter. It's not that we have to, but he enjoys taking little present for his friends and I enjoy making them. So I found myself the night before scrambling to find something quick and easy to put together for him. So I turned to my favorite source of inspiration Pintrest.

First can I must sing the praises of Pintrest. It is quickly eking out Facebook as my favorite social media, but that is another story. There were lots of different Easter crafts I could've done but considering I was starting this at 11pm so I was extremely limited on time. Another constraint I had was his school strict food policies. I'm the mom that always brings the snacks for parties so luckily I had a list of approved foods. BTW goldfish are safe for those with nut allergies. So browsing through my board of Easter inspiration I found these. Voila!!!! I have my game plan.

These little carrot snack bags are a snap to make. All you need is:

--Disposible icing bags (found in the cake decorating department)
--twist ties (I actually used paper ties that I save from my son's toy packaging)
--Goldfish (you could also use orange jelly beans, cheese puffs etc.)
--Something green (It could be ribbon or cut construction paper be creative. I used a paper basket filler)

They are as easy to make as filling the bag twist the top, place the green on top and secure with tie. Couldn't get easier than that. For the tag I just used some of my scrap paper and Tim Holz distressing inks, and did some basic distressing. Project from beginning to end took about two hours, and since I used supplies that I already had on had the only cost was the price of a giant container of Goldfish. It was well worth the time, effort and cost to see how proud my son was to take them to school, and to see the delight on his classmates and teachers faces. 


On a side note I just had to share these from Easter last year. These Dino Eggs were totally adorable. I tried to find them this year, because dinosaurs rule our house. Alas, they were no where to be found. At least we have the photos to remember them.


Wednesday, March 28, 2012

Wordless Wednesday--That Allie Girl

Not much to say today, I just wanted to share a few photos from a shoot I did Monday for an up and coming Country singer from Put-n-bay. She was so beautiful and a delight to work with. Luckily I'll get to work with her again next Monday to shoot her edgier photos. I can't wait.

Enjoy!


Wednesday, March 21, 2012

For the love of bacon


After 22 years of vegetarianism for me and 16 years for my husband, we started eating meat again. Our son refused to eat a vegetarian diet and we had grown bored of the diet. We started with fish, what I like to call the gateway meat, and after a year we gave in to the rest. Now that I'm eating meat again I'm finding a whole new world of culinary fun. Bacon has been one of my favorite things to cook with and eat. If fish is the gateway meat, then Bacon in the hook that keeps you. 

I recently join the Pinterest world. While searching around for cool ideas to fix for my family for Valentines brunch I found instructions for bacon roses at http://www.instructables.com/id/Bacon-Roses/?ALLSTEPS  I thought Genius!!!! What a perfect gift for a man who returns everything I buy him. I had to give it a try.

What you will need:

--mini muffin pan 
--cookie sheet
--cook rack
--awl
--bacon
--silk roses


Before you start, you will need to poke holes in the bottom of the muffin pan. I know this seems wasteful, but it was a great excuse for me to replace my old pan that only holds 12 with one that holds 24. You can still use it again just use mini muffin liners. The hole allows the grease to drip out onto a liner pan.


Lay the bacon flat. Decide which side you want to be the base and which side you what to be the petals.  Roll the bacon keeping it tighter at the base and looser at the top. 


Place bacon base down in muffin cups. To give the bacon a bit more detail I flared the top by running my finger along the top edge causing it to flare out. 


Place the muffin tin on the cookie sheet and rack to catch the grease. That is a mess no one wants to clean up. Bake at 375 for 30-40 minutes. Allow to cool on a paper towel.


While bacon is cooking remove the entire flower-heads off the stem be sure to save the green bud part at the bottom. I saved the peddles  for later also. I'm sure they will come in handy sometime. Replace the green bud part. When bacon roses are cool enough to touch slide them on the stems about 1 inch and rest them on the green. 

I doubt I do this very often, but this was a fun little surprise for my husband. I had them sitting on the table when he woke up. He had to take a second look. I totally impressed him and he was flattered at the effort I put in making these for him. Score one for mommy.  Definitely worth trying.